Payments
The Payments section lets you configure the payment gateways available to customers at checkout and view a log of all payment transactions. SnapCart supports PayPal, Razorpay, PayTM, and Cash on Delivery out of the box.
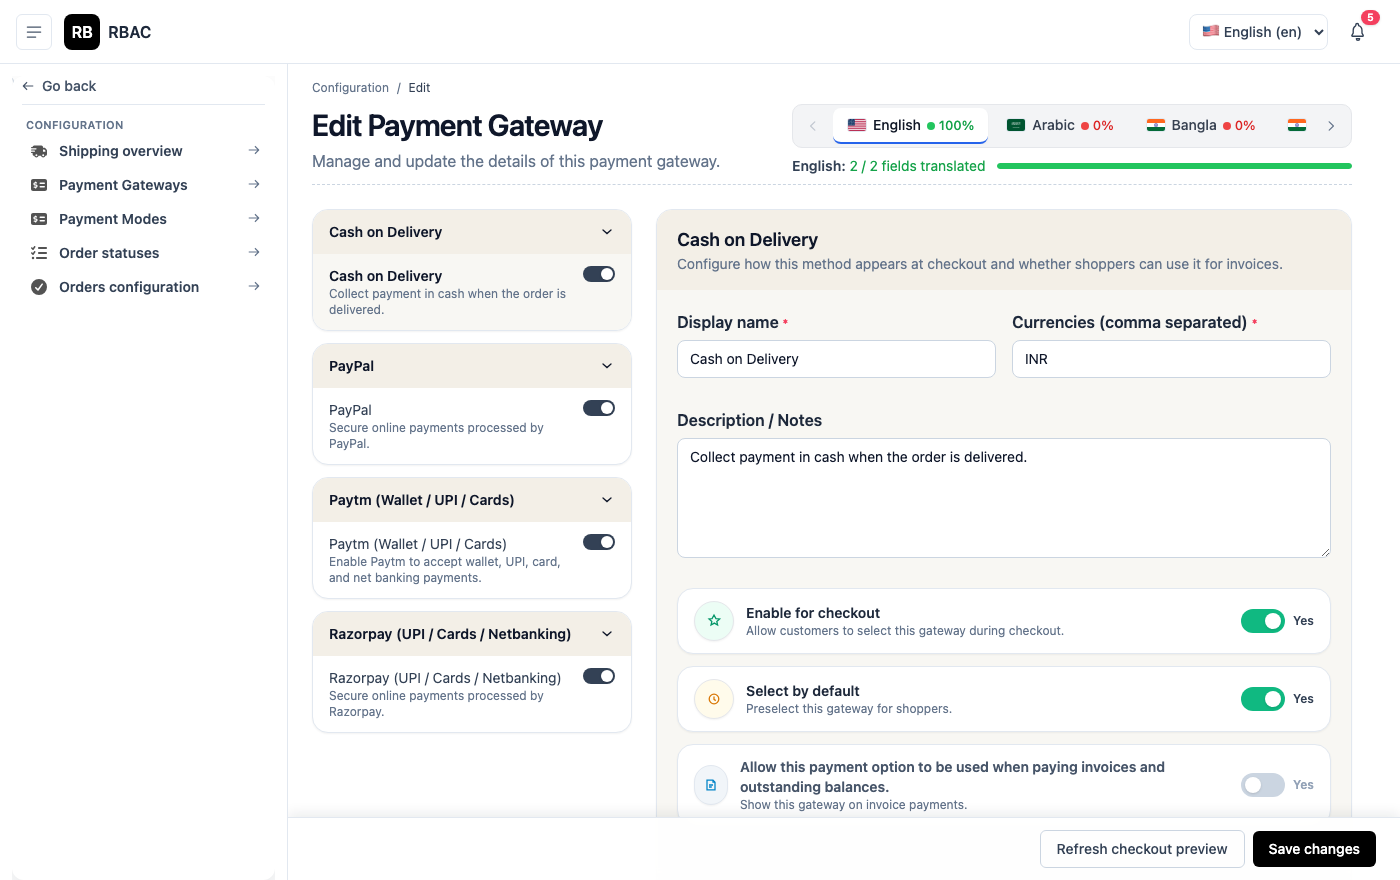 Payment gateway configuration page showing all four gateways with their activation status
Accessing Payments
Click Payments in the left sidebar.
:::info Permissions required
| Action | Permission |
|---|---|
| View payment settings | payment.view |
| Edit gateway credentials | payment.edit |
| ::: |
Payment Gateways Overview
| Gateway | Best For | Supports |
|---|---|---|
| PayPal | International customers | Credit/debit cards, PayPal wallet |
| Razorpay | Indian customers | UPI, net banking, cards, wallets, EMI |
| PayTM | Indian customers | PayTM wallet, UPI, cards |
| Cash on Delivery | All customers | No online payment — pay on delivery |
You can enable multiple gateways simultaneously. Customers see all active gateways at checkout and choose their preferred one.
Configuring PayPal
PayPal gateway settings page showing Client ID, Secret, and Mode fields
- Go to Payments → PayPal.
- Log in to developer.paypal.com and create an application to get your credentials.
- Enter the credentials in SnapCart:
| Field | Where to Find It |
|---|---|
| Client ID | PayPal Developer Dashboard → My Apps & Credentials → your app |
| Client Secret | Same location as Client ID |
| Mode | Sandbox for testing, Live for production |
- Toggle Status to Active.
- Click Save.
Testing PayPal
In Sandbox mode, use PayPal sandbox buyer accounts to simulate payments:
- Log in to developer.paypal.com
- Go to Sandbox → Accounts and note the test buyer email and password
- Place a test order on your storefront and complete payment using the sandbox buyer account
Going Live with PayPal
- Change Mode to Live
- Replace Sandbox credentials with your Live credentials from the PayPal Developer Dashboard
- Place a small real test transaction to confirm it works before advertising
Configuring Razorpay
Razorpay settings showing Key ID, Key Secret, and mode toggle
Razorpay is the recommended gateway for Indian stores. It supports the widest range of Indian payment methods.
- Go to Payments → Razorpay.
- Log in to your Razorpay Dashboard.
- Go to Settings → API Keys and generate a key pair.
- Enter in SnapCart:
| Field | Description |
|---|---|
| Key ID | Starts with rzp_test_ (test) or rzp_live_ (production) |
| Key Secret | Generated alongside the Key ID — copy immediately, it's shown only once |
| Mode | Test or Live |
| Webhook Secret | Optional — for verifying Razorpay webhook payloads |
- Toggle Status to Active.
- Click Save.
Testing Razorpay
In Test mode, use these test card details:
| Field | Value |
|---|---|
| Card Number | 4111 1111 1111 1111 |
| Expiry | Any future date (e.g., 12/28) |
| CVV | Any 3 digits (e.g., 123) |
| OTP | 1234 (shown on the Razorpay test checkout) |
For UPI testing: use success@razorpay as the UPI ID.
Razorpay Webhooks (Recommended)
Configure Razorpay webhooks so that your store is notified of payment events even if the customer closes the browser mid-payment:
- In Razorpay Dashboard → Settings → Webhooks → Add New Webhook
- Set the endpoint URL to:
https://yourdomain.com/api/v1/webhooks/razorpay - Select events:
payment.captured,payment.failed,refund.created - Copy the webhook secret and paste it into SnapCart's Razorpay settings
Configuring PayTM
PayTM settings page showing Merchant ID, Merchant Key, and environment selection
- Go to Payments → PayTM.
- Log in to business.paytm.com and go to Developer Settings → API Keys.
- Enter in SnapCart:
| Field | Description |
|---|---|
| Merchant ID | Your PayTM merchant identifier (MID) |
| Merchant Key | Your PayTM secret key |
| Industry Type | Select your business category (e.g., Retail) |
| Mode | Staging or Production |
- Toggle Status to Active.
- Click Save.
Testing PayTM
In Staging mode, PayTM provides test credentials from their developer portal. Use the staging merchant ID and key for testing — real transactions will not be processed.
Cash on Delivery (COD)
COD requires no API credentials or external accounts.
COD settings showing status toggle and optional COD surcharge field
- Go to Payments → Cash on Delivery.
- Toggle Status to Active.
- Optionally set a COD Surcharge — a fixed amount added to orders paid by COD (e.g., ₹50 handling fee).
- Set a Minimum Order Amount below which COD is not available (optional).
- Click Save.
:::tip When to use COD COD is popular in markets with low credit card penetration or low online payment trust. However, it increases the risk of failed deliveries and returns. Consider offering COD only above a minimum order value. :::
Transaction Logs
Go to Payments → Transactions to see a detailed log of every payment attempt.
Transaction log showing order number, gateway, transaction ID, amount, status, and date
| Column | Description |
|---|---|
| Order # | The order this payment belongs to — click to open the order detail |
| Gateway | Payment provider used |
| Transaction ID | Gateway-issued reference identifier |
| Amount | Amount charged in the order's currency |
| Status | Success, Failed, or Pending |
| Date | Timestamp of the payment attempt |
Viewing the Full Gateway Response
Click any transaction row to see the raw JSON payload returned by the payment gateway. This is useful for debugging payment failures — the error_description field in the response usually explains exactly why a payment failed.
Common Failure Reasons
| Error | Likely Cause |
|---|---|
card_declined | Customer's bank declined the card — customer should try another card or contact their bank |
insufficient_funds | Card has insufficient balance |
invalid_cvv | Customer entered the wrong CVV |
authentication_failed | 3D Secure / OTP verification failed |
gateway_timeout | Temporary connectivity issue — customer can retry |
payment_cancelled | Customer closed the payment modal without completing |
Refunds
SnapCart records refund status but does not initiate refunds directly. Refunds must be issued through each gateway's dashboard:
| Gateway | Where to Issue Refunds |
|---|---|
| PayPal | PayPal Merchant Dashboard → Activity → Find transaction → Refund |
| Razorpay | Razorpay Dashboard → Transactions → Find transaction → Refund |
| PayTM | PayTM Business Dashboard → Payments → Find transaction → Refund |
| COD | Bank transfer or store credit (manual process) |
After issuing a refund in the gateway dashboard, update the order status in SnapCart to Refunded so the customer receives a confirmation email.
Switching Between Test and Live Mode
:::warning Always verify before going live Before switching any gateway to Live mode:
- Confirm all credentials are the Live (not Sandbox/Test) credentials
- Place a small real test transaction
- Verify the money appears in your gateway account
- Set the status back to Active and notify customers :::
Switching from test to live requires updating the credentials in each gateway's settings page in SnapCart.